Chiuso per… vari motivi :( / Closed for… several reasons :(

Standard

SCROLL DOWN FOR ENGLISH
Cari lettrici e lettori,

come sicuramente avete notato è più di un anno che Valentina ed io non postiamo nulla.
Abbiamo tutte e due tantissimo da fare e abbiamo quindi deciso di “chiudere” questo blog lasciando però tutti i post che abbiamo scritto sino ad ora.

Vi ringraziamo per averci seguite fin qui, vi salutiamo e vi auguriamo una buona vita! :)

Nicoletta

ENGLISH
Dear readers,

as you might have noticed it’s been more than a year since Valentina and I have been writing here. We are both very busy, that’s why we decided to “close down” this blog. All the previous posts will stay, only you won’t read us any more from now on.

Thank you for following us till here, our warmest regards and have a great life! :)

Nicoletta

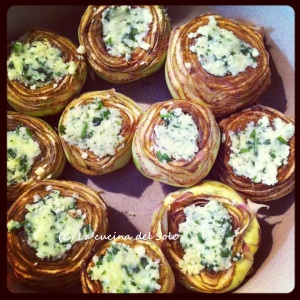
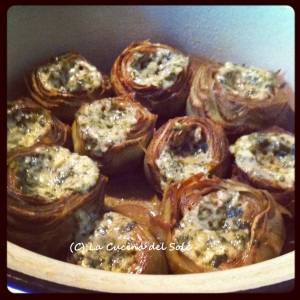
Carciofi ripieni stufati/Stewed stuffed artichokes

Standard

IMG_4511 - kopieSCROLL DOWN FOR ENGLISH TEXT

Dopo la frittata ecco in’altra ricettina facile facile coi carciofi piccoli, quelli tipici nostri, italianissimi e facili da pulire e da preparare come quelli violetti o quelli pugliesi, meravigliosi e senza spine (proprio quelli che ho usato per fare questo piatto, ne avevo portati con me ad Amsterdam due chili già puliti dalla mia mitica mamma l’ultima volta che sono stata a Bari, a inizio maggio).
A differenza dei carciofi ripieni della mamma di Valentina io non ci metto il pane né le uova e li faccio in modo del tutto “sicuro” e pentolaapressione-free. ;)

Puliteli rimuovendo tutte le parti dure e togliete anche la parte centrale che solitamente contiene un po’ di fieno – per questa operazione potete usare un cucchiaino – per fare spazio al ripieno, riempiteli e poi stufateli in pentola. Niente di più, niente di meno, facilissimo. E se non calcolate il tempo necessario alla pulitura sono pronti in un batter d’occhio! Soprattutto se si ha una mamma che li pulisce. ;)

Carciofi ripieni stufati

Per 4 persone  (contorno)

Ingredienti:

8 carciofi piccoli, puliti
30 gr. di pecorino romano grattugiato
30 gr. di Parmigiano o Grana grattugiato
2 spicchi d’aglio piccoli, sbucciati e tritati finemente
1/2 manciatina di prezzemolo tritato
olio EVO
sale e pepe nero macinato

Rimuovi la parte interna (quella col fieno) dei carciofi con un cucchiaino. Fa’ in modo che vi sia abbastanza spazio per almeno 1-2 cucchiaini di ripieno.
Pareggia le basi dei carciofi con un coltellino in modo che risultino piatte consentendo ai carciofi di restare dritti all’interno della pentola.

Mescola pecorino, parmigiano, aglio e prezzemolo tritati, poi aggiungi un po’ di pepe nero macinato di fresco e mescola ulteriormente.

Riempi i carciofi con questa mescola e mettili in una pentola abbastanza alta e dal fondo spesso (io ho usato una piccola Le Creuset).
Aggiungi 2-3 cucchiai di olio d’oliva e 1 dl d’acqua, condisci con un po’ di sale e copri.
Stufa i carciofi per 15-20 minuti tenendo il coperchio sulla pentola e servili ben caldi.

ENGLISH

IMG_4513 - kopieAfter the frittata here’s another very easy recipe to prepare with small artichokes, the ones you can buy in Italy and France the violetti/violets, for example. The ones you can buy in Puglia are perfect, beautiful and thornless, and those are exactly the ones I used for this recipe since I brought with me 2 kg. of these little beauties last time I came back from Bari at the beginning of May (courtesy of my Mum who always gives me clean artichokes to take home when it’s season, LOVE her!)

Clean them (here you can see how) removing all the hard bits and the central part (for this you can use a small teaspoon) to make some space, fill them and then stew them in a pan. Nothing more than this. If you don’t count the cleaning part they’re ready in no time!

Carciofi ripieni stufati (stewed stuffed artichokes)

Serves 4 (side dish)
Ingredients:

8 small Italian or French artichokes, cleaned
30 gr./1 oz. grated pecorino romano
30 gr./1 oz. grated Parmesan or Grana cheese
2 small cloves of garlic, peeled and finely chopped
1/2 handful of flat-leaf parsley, finely chopped
extra virgin olive oil
salt and black pepper

Remove the inside part of the artichokes with a small teaspoon making sure you eliminate all of the hay. Make enough space for at least one or two teaspoons of filling.
Trim the bases of  the artichokes with a small knife so that they’re flat and even and can stand in the pan.

Mix pecorino, parmigiano, chopped garlic and parsley together and add a little freshly ground black pepper, mixing further.

Fill the artichokes with this mixture and then place them standing in a deep enough pan with a thick bottom (I used a small Le Creuset).
Add 2-3 spoons of olive oil and 1 dl/0,4 cup of water, season with salt and cover with a lid.
Stew for 15-20 minutes with the lid on and serve hot.

#MeatlessMonday: frittata di carciofi / artichoke frittata

Standard

frittata di carciofiSCROLL DOWN FOR ENGLISH TEXT

Se dovessi mangiare un solo tipo di verdura tutta la mia vita probabilmente opterei per il carciofo. Il mio amore per questo ortaggio è immenso.
Mi piace il suo sapore particolare e un po’ amarognolo, la sua consistenza e anche il fatto che non è troppo facile da “gestire”.
Per goderseli bisogna darsi un po’ da fare e in questo i carciofi sono proprio come la vita. :)

Ogni volta che torno in Puglia, la regione dove sono cresciuta e dove i carciofi vengono coltivati in maniera massiccia, mi viene un vero e proprio attacco di invidia.
L’ultima volta che ci sono andato sono diventata quasi verde come un carciofo vedendo a un mercato rionale i miei preferiti, quelli piccoli e senza spine pugliesi, costare solo 3 € per 7 pezzi, grrrrrrrr!
Perché qui in Olanda sono così costosi e, soprattutto, spesso vecchi e già avvizziti???

Comunque, tornando alla preparazione di questo meraviglioso ortaggio, la sua pulizia richiede un bel po’ di lavoro (vedere foto e ricetta) e si elimina una buona parte di questo incredibile fiore, però ne vale la pena: quel che resta dopo tutto quel lavoro è una verdura assolutamente deliziosa ed eclettica, quindi sicuramente il gioco vale la candela!
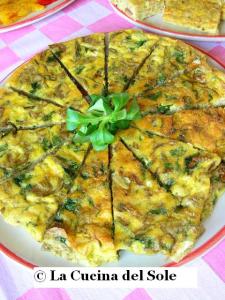
E la si può utilizzare per una buonissima frittata proprio come faccio spesso io.

Se non sapete come pulire i carciofi potete guardare il mio video.

FRITTATA DI CARCIOFI

Ingredienti per 4-6 persone

10 uova
6-8 carciofi piccoli (violette o simili)
50 g di parmigiano grattugiato
2 spicchi d’aglio
un mazzetto di prezzemolo
sale e pepe
un po’ di latte o panna
olio extra vergine di oliva

Preriscaldate il forno a 180 ° C.

Pulite i carciofi eliminando i gambi (che potete “sbucciare” e utilizzare anche come ho fatto per questa frittata, vedere il suggerimento a fine ricetta), poi le foglie esterne più dure (per vedere come si fa guardate questo video).

Mettete i carciofi in una ciotola d’acqua fredda acidulata con un po’ di succo di limone o aceto in modo che non si ossidino diventano molto scuri. Lasciateli nel loro “bagno” per almeno 10 minuti.

Nel frattempo sbattete leggermente le uova con un goccio di latte o panna, parmigiano grattugiato, sale e pepe.

Tagliate i carciofi a fettine sottili e friggetele in olio d’oliva insieme agli spicchi d’aglio schiacciati. Di solito tendono a diventare piuttosto secchini quindi aggiungete un po’ di acqua calda di tanto in tanto e fateli cuocere a fuoco dolce finché sono morbidi. Condite con prezzemolo tritato, sale e pepe.

Disponete i carciofi in una teglia foderata con carta da forno.
Aggiungete il composto di uova e suddividete tutto in modo uniforme all’interno della teglia.

Cuocete la frittata in forno per circa 20 minuti o finché  non è ben ferma se premuta con le dita e bella dorata.

Lasciatela raffreddare un po’ e servitela tiepida o a temperatura ambiente.

SUGGERIMENTO: è possibile mangiare anche i gambi dei carciofi. Prima di tutto bisogna eliminare la parte più dura che li riveste e quindi metterli in acqua acidulata come il resto dei carciofi, dpo di che è possibile stufarli o friggerli insieme al resto dei carciofi.

ENGLISH

If I had to eat just ONE kind of vegetables my whole life I would probably opt for artichokes. My love for this vegetable is immense.
I love their distinct flavour, their special texture and also the fact that they are not too easy to “handle”.
You have to do some work if you want to enjoy them and in that they’re just like life. :)

Every time I’m back to Puglia, the Italian region where I grew up and where they are massively grown, I have an envy attack.
Last time I went there I almost turned as green as an artichoke when I saw my favourite, thornless carciofi costing just 3 euros for 7 pieces at the market, grrrrrrrr!!!
Why are they so expensive here in Holland and, most of all, often old and sloppy???

Anyway, back to the preparation of this wonderful vegetable. Cleaning it is a lot work (see photos and recipe) and you eliminate quite a  lot of this amazing flower, as I often hear during my cooking workshops when I show how to do it.
So what? What you have after all that work is something totally DELICIOUS, so definitely worth the hassle!
And you can use it for a wonderful frittata just like I do.

If you don’t know how to clean artichokes you can watch my video.

FRITTATA DI CARCIOFI (artichoke frittata)

Serves 4-6

10 eggs
6-8 small artichokes
50 g grated Parmesan cheese
2 garlic cloves
a bunch of flat-leaf parsley
salt and pepper
a splash of milk or cream
extra virgin olive oil

Preheat the oven at 180°C.

Clean the artichokes by removing the stems (which you can peel and use too like I did for this frittata! See TIP at the end of the recipe) then the hard, outer leaves (see how I do it in this video).

Place the artichokes in a bowl with cold water and a little lemon juice or vinegar so that they don’t get dark. Leave them  in their “bath” for at least 10 minutes.

Meanwhile lightly beat the eggs with a dash of milk or cream, grated Parmesan, salt and pepper.

Cut the artichokes into thin slices and fry them in olive oil together with the crushed garlic cloves. They usually tend to get too dry so add a little hot water from time to time and let them gently cook until soft. Season with finely chopped parsley, salt and pepper.

Lay the artichokes in a baking dish lined with baking parchment.
Add the egg mixture and spread everything evenly inside the dish.

Bake the frittata in the oven for about 20 minutes or until it feels firm under your fingers and becomes golden brown.

Leave to cool a bit and serve lukewarm or at room temperature.

TIP: you can also eat the artichoke stems. First you have to trim the harder part around them and then put them in lemony (or vinegary) water like the rest of the artichokes. After that you can stew or fry them together with the artichokes.

Ingredienti_frittata

Puliti

Carciofi_cotti

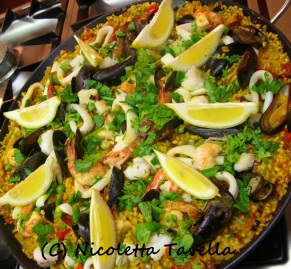
Videoricetta: la paella di Oliver / Video recipe: Oliver’s paella

Standard

??????????SCROLL DOWN FOR ENGLISH TEXT

Piatto classico della tradizione spagnola, la paella è originaria di Valencia, città sulla costa orientale del Paese. La versione originale chiamata paella valenciana prevede l’uso di fagiolini verdi piatti, carne (principalmente pollo e coniglio), fagioli bianchi e lumache, però esistono molte varianti che includono solo pesce, crostacei e molluschi (paella marinera) oppure carne e pesce insieme (paella mixta).
La pentola larga e bassa utilizzata per preparare questa ricetta è la paella detta anche paellera. Sul nome dato a questo strumento gli spagnoli sono nettamente divisi: chi preferisce l’uno e chi invece sostiene che il nome corretto sia l’altro. La Real Academia Española, ovvero l’istituzione ufficiale che si occupa di stabilire le regole relative alla lingua spagnola, accetta entrambe. Per questioni di chiarezza nella ricetta usiamo il termine paellera per la pentola e paella per il piatto.

Oliver

Oliver e la sua paella/and his paella

Volendo acquistarne una, sceglierla possibilmente col fondo abbastanza spesso per favorire una cottura uniforme e non troppo rapida del riso, il quale dopo una prima mescolata non va più mosso in modo da formare quella deliziosa crosticina sul fondo della pentola che, insieme alla perfetta cottura di tutti gli ingredienti, caratterizza la paella davvero ben fatta.
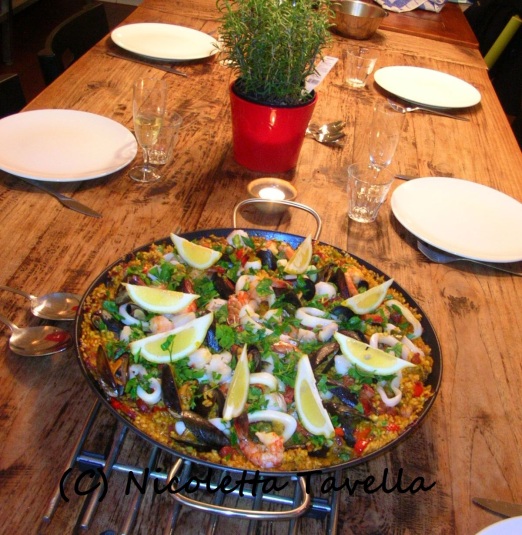
La versione di Oliver, amico spagnolo canario – ossia delle Isole Canarie – è quella mixta, con carne e pesce insieme. Il chorizo qui utilizzato è il classico salame spagnolo di carne suina caratterizzato da colore rosso uniforme anche nel grasso in quanto aromatizzato e “colorato” con pimentón, polvere di peperone affumicato, o con paprika più o meno piccante.
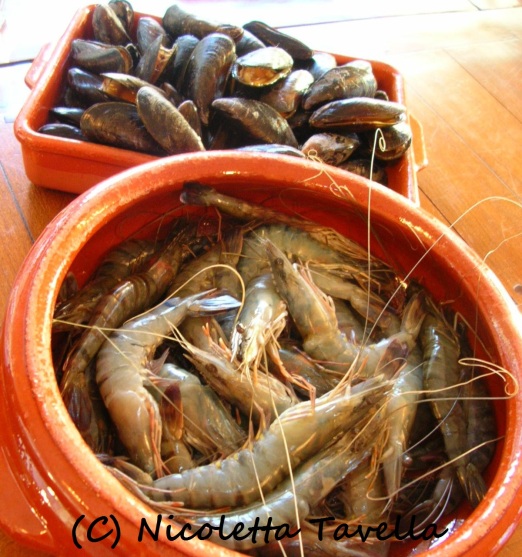
L’uso di pesce, crostacei e molluschi rende la preparazione un po’ più delicata di quella della paella con sola carne in quanto occorre evitare di cuocere troppo i gamberoni che altrimenti diventerebbero stopposi. Aggiungerli a cottura quasi ultimata del riso assaggiando quest’ultimo e calcolando circa tre ulteriori minuti sul fuoco. Anche per il merluzzo e i calamari è preferibile una cottura non troppo prolungata (quattro-cinque minuti al massimo). Oliver fa cuocere abbastanza a lungo le cozze per far sì che il riso si insaporisca ancora meglio.

Paella di Oliver

Ingredienti per 4-6 persone:

250 gr riso per paella o per risotti
20 cozze crude col guscio
250 gr. gamberoni freschi
3-4 calamari grandi puliti
150 gr. filetto di merluzzo
100 gr. pancetta
100 gr. chorizo (salame spagnolo)
150 gr. piselli freschi sgusciati
4 pomodori medi
2 peperoni rossi
1 peperone verde
2 cipolle rosse
4-5 spicchi d’aglio
olio d’oliva extravergine
sale
2 prese di zafferano in stimmi o in polvere
1 presa di pepe di Caienna
2,5 dl. vino bianco secco
2,5 l. brodo di pollo
prezzemolo e due limoni per guarnire

Scaldate abbondante olio nella paellera e soffriggetevi le cipolle tagliate a pezzettini. Aggiungete i peperoni tagliati a dadini e l’aglio tritato abbastanza fine e lasciate soffriggere ancora qualche minuto.
Aggiungete il chorizo e la pancetta a dadini e quindi i pomodori sbollentati, spellati e tagliati a pezzetti insieme al pepe di Caienna. Mescolate e lasciate cuocere per circa 5-10 minuti a fuoco medio.
Aggiungete il riso, alzate un po’ la fiamma e mescolate bene.
Versate il vino bianco, mescolate e lasciate evaporare l’alcol.
Insaporite con lo zafferano mescolando bene per dare al riso un bel colore giallo uniforme.
Poggiate le cozze sul riso e mescolate delicatamente.
Aggiungete i piselli e, subito dopo, 4-5 mestoli di brodo bollente che dovrà coprire il riso.
Cuocete il riso a fiamma medio/alta fino a cottura quasi ultimata aggiungendo brodo di tanto in tanto se il riso si asciuga troppo.
Aggiungete i calamari tagliati ad anelli e il filetto di pesce a pezzi grossi e spingeteli delicatamente nel riso senza smuoverlo troppo. Aggiungete altro brodo se necessario.
Circa tre minuti prima che il riso sia pronto aggiungete alla paella i gamberoni privati di testa, carapace, zampe e filo intestinale e sciacquati. Poggiateli sul riso e girateli in modo che cuociano da entrambi i lati. Se non volete rischiare di cuocerli troppo potete anche saltarli brevemente in padella con un po’ d’olio e aggiungerli alla paella una volta rimossala dal fuoco. Insaporite eventualmente con un po’ di sale.
Spegnete la fiamma e lasciate riposare per 5 minuti.
Servite la paella guarnita con prezzemolo tritato e fette di limone.

ENGLISH

A classic traditional Spanish dish, paella is originally from Valencia, a city on the East coast of the country. The original version called paella valenciana involves the use of flat green beans, meat (mainly chicken and rabbit), white beans and snails, but there are many variations that include only fish, crustaceans and molluscs (paella marinera) or meat and fish together (paella mixta).
The wide, shallow pan used to prepare this recipe is the paella, also called paellera. Spaniards are quite divided about the right name for this beautiful cooking instrument: some prefer paella and some others argue that the correct name is paellera. The Real Academia Española, the official institution that takes care of setting the rules for the Spanish language, accepts both. For clarity in the recipe we use the term paella for the dish and paellera for the pan.
When looking for one to buy, select it possibly with a thick enough bottom to promote uniform cooking of the rice without burning it. This has to happen in such an way that the rice is no longer stirred after a first, initial stir so as to form that delicious crust on the bottom of the pan that, together with the perfect cooking of all the ingredients, characterizes a really well done paella.
This version by Oliver, a friend from the Spanish Canary Islands, is a paella mixta, with meat and fish together. The chorizo ​​used here is the classic Spanish pork sausage characterized by a uniform red colour even in the fat parts since the meat and fat mixture has been flavoured and “coloured” with pimentón, red smoked pepper powder, or more or less spicy paprika.
The use of fish, crustaceans and molluscs makes the preparation a little more delicate than a paella with just meat as it is necessary to avoid overcooking the prawns that would otherwise become unpleasantly flaky. Add them when the rice is almost cooked calculating about three more minutes on the stove. Also for cod and squid it is preferable to avoid too long a cooking time (4 to 5 minutes maximum). Oliver cooks the mussels long enough to ensure that the rice absorbs their juices and flavour even better.
The video has Italian subtitles only but you’ll get what we mean by looking at the images and following the written recipe you find here.

Oliver’s paella

Serves 4-6:

250 g rice for paella or risotto
20 raw mussels in their shells
250 gr. fresh clean prawns (without head, shell and intestines)
3-4 large cleaned squid
150 gr. cod fillet
100 gr. bacon or pancetta
100 gr. chorizo ​​(Spanish sausage)
150 gr. fresh shelled peas
4 medium tomatoes
2 red peppers
1 green pepper
2 red onions
4-5 cloves of garlic
extra virgin olive oil
salt
2 pinches of saffron stigmas or powder
1 pinch of Cayenne pepper
2,5 dl. dry white wine
2,5 l. chicken stock
two lemons and flat-leaf parsley for garnishing

Heat plenty of oil in the paellera and fry the chopped onions in it. Add the diced peppers and the finely chopped garlic and fry for a few more minutes.
Add the chorizo, the bacon or pancetta and the blanched, peeled and diced tomatoes together with the Cayenne pepper. Stir and cook for about 5-10 minutes on a medium heat.
Add the rice, raise the heat a little and stir well.
Pour the white wine, stir and allow the alcohol to evaporate.
Season with saffron, stirring well to give the rice a beautiful, uniform yellow colour.
Place the mussels on top of the rice and stir gently.
Add the peas and, immediately after, 4-5 ladles of hot stock which will have to cover the rice completely.
Cook the rice on a medium / high flame until almost cooked, adding stock from time to time if it gets too dry.
Add the squid cut into rings and the fish fillet into large pieces and push them gently into the rice without moving it too much. Add more stock if necessary.
Add the prawns to the paella about three minutes before the rice is ready. Lay them on the rice and turn them so that they evenly cook on both sides. If you don’t want to risk overcooking you can also briefly sauté them in a pan with a little olive oil and then add them to the paella once you take it from the fire. Season with a little salt if necessary.
Turn off the heat and let the paella rest for 5 minutes.
Serve garnished with chopped parsley and lemon slices.

??????????

??????????

Le sgagliozze baresi (chip di polenta fritta/fried polenta chips)

Standard

IMG_4380 - kopieSCROLL DOWN FOR ENGLISH TEXT

A Bari uno degli spuntini preferiti dei residenti della città vecchia (Bari Vecchia) – e di chi ama girellare per friggitorie – è costituito dalle sgagliozze, ovvero quadrotti o rettangoli di polenta fritta. Le sgagliozze venivano originariamente vendute dopo la messa fuori della Cattedrale di San Nicola il 6 dicembre, giorno del santo patrono della città. Oggi a Bari Vecchia ci sono ancora alcune simpatiche signore che vendono questa polenta calda, fragrante e croccante per le strade del centro storico, anche se non vi consiglio di avventurarvi in quella zona senza una guida locale. ;)

Come la polenta sia finita sulle strade e le tavole del Sud Italia è ancora un grande mistero: il mais non è esattamente uno dei principali prodotti coltivati in questa zona e posso solo immaginare che sia stato portato là da uno dei molti popoli, italiani e non, che hanno occupato il “tacco” dello Stivale nel corso dei secoli.

La settimana scorsa stavo allegramente friggendo un po’ di sgagliozze con l’amico pugliese Morris e ridevamo, fantasticando su come i Baresi, abituati ai deliziosi prodotti preparati con il grano duro delle loro fertili terre, possano aver reagito – nel modo molto “diretto” che li caratterizza – al loro primo morso di polenta “importata”: “Madò, e ci jè chess cacat? Mè, ammin jind a la fr’ttur ca fasc tutt chiù bbun!” *** (ovvero: “Che cosa è questa roba disgustosa? Facciamola friggere, tutto è più buono una volta fritto!”)
E così, a nostro avviso, sono nate le sgagliozze. Solo che non sono così sicura del valore storico della nostra teoria. ;)

La polenta fritta è molto popolare nel Nord Italia. I miei nonni che venivano dal Veneto facevano questo piatto regolarmente utilizzando avanzi di polenta, servita calda con fette di Gorgonzola. Il meraviglioso formaggio erborinato si scioglie sulla polenta calda e la combinazione diventa un antipasto da leccarsi le dita.

Utilizzate 2 l. di acqua bollente salata, 500 gr. di polenta rapida – con la polenta normale dovrete mescolare per circa 40 minuti invece di 3-4 – e un buon olio di girasole.

Versate la farina di polenta a cottura rapida a poco a poco nell’acqua bollente e mescolate bene. Lasciate cuocere per circa 3-4 minuti fino a quando il composto si addensa.
Versate la polenta in una teglia da forno di grandi dimensioni che avrete in precedenza unto con olio d’oliva. Lasciate raffreddare.
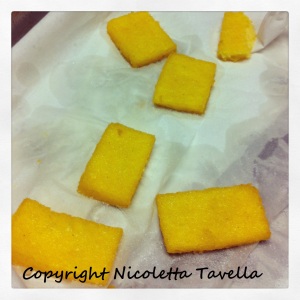
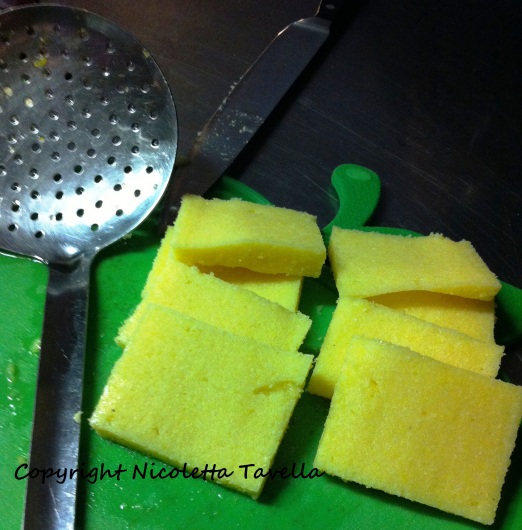
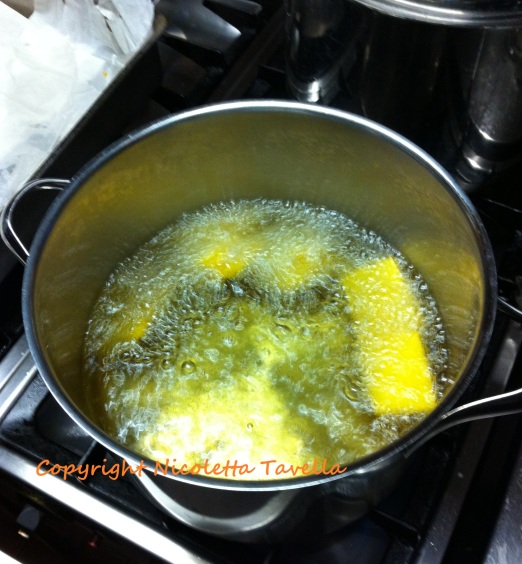
Tagliate la polenta raffreddata a quadrotti o rettangoli  di circa 1 cm di spessore e friggetela in olio di semi di girasole caldo fino ad ottenere la doratura e la croccantezza desiderate.
Fate scolare bene su carta da cucina per eliminare l’olio in eccesso, cospargete di sale marino fino e servite le sgagliozze calde. Buon appetito!

*** Un grazie a Cima di Rapa Valentina per la consulenza linguistica. ;)

ENGLISH

One of the favorite snacks of the residents of the Old City in Bari (Bari Vecchia) is sgagliozze, square or rectangular pieces of fried polenta (big polenta fritters). These were originally sold after Mass outside the St. Nicholas Cathedral on December 6, the day of the patron saint of the city. Today there are still a few old ladies who sell these hot, fragrant and crispy polenta squares on the streets of the Old Town, even though I would not advise you to venture in that area without a local guide. ;)

How polenta ended up on the Southern Italian streets and tables is still a big mystery to me: corn is not exactly one of the main crops in this area and I can only imagine that it was brought there by one of the many Italian and foreign rulers that occupied the “heel” of the Boot in the course of history.

Last week I was with happily frying some sgagliozze with my friend Morris from Puglia, laughing and fantasizing about how the Baresi, who are accustomed to the delicious grano duro (durum wheat) products of their fertile country, would have reacted on their first bite of “imported” polenta: “What is this disgusting stuff? Let’s fry it, everything tastes better when it is fried!”
And so, in our view, were the sgagliozze born. I’m just not so sure, though, about the historical value of our theory. ;)

Fried polenta is very popular in the North of Italy. My grandparents who came from Veneto made this dish regularly with polenta leftovers, served hot with slices of Gorgonzola on top. The delicious cheese melts on the hot polenta and the whole combination becomes a finger-licking good antipasto.

Use 2 l. of well-salted boiling water, 500 gr. of precooked polenta (“polenta rapida“) – with regular polenta you’ll have to stir for about 40 minutes instead of 3-4 – and good sunflower oil.

Sprinkle the fast-cooking polenta flour little by little into the boiling water while stirring well and cook for about 3-4 minutes until the mixture thickens.
Pour the polenta into a large baking tray that you have previously greased with olive oil. Allow to cool.
Cut the cooled polenta into squares or rectangles (about 1 cm thick) and fry them in hot sunflower oil until golden and crispy.
Drain well on kitchen paper to remove the excess fat, sprinkle with fine sea salt and serve hot. Buon appetito!

IMG_4372 copia - kopie

IMG_4377 - kopie

Riso integrale con cardi mariani e sponsali/ Brown rice with milk thistle and leeks

Standard

SCROLL DOWN FOR ENGLISH TEXT

13 - 1 (1)

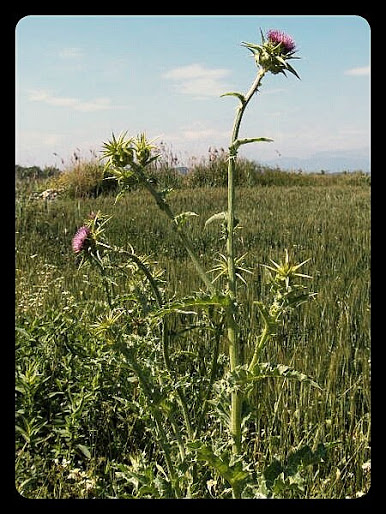
Sybillum marianum (da Wikipedia)

Il cardo mariano è conosciuto in farmacologia per le sue proprietà antinfiammatorie ed è un toccasana per depurare il fegato…
MA…Nella mia cucina è conosciuto per ben altre proprietà! :-)
E’ buonissimo fritto,è  buonissimo in brodo, ma io ho voluto dargli una terza chance..

13 - 1 (2)
E allora ho inventato questa ricetta:

Riso integrale con cardi mariani e sponsali

Ingredienti per 4 persone:
Riso integrale: 250 gr
Cardi mariani:  500 gr più o meno ( pesati già puliti..)
Sponsali: 3
Latte intero: 1 bicchiere
Pecorino grattugiato
Pepe qb
Sale qb
olio evo

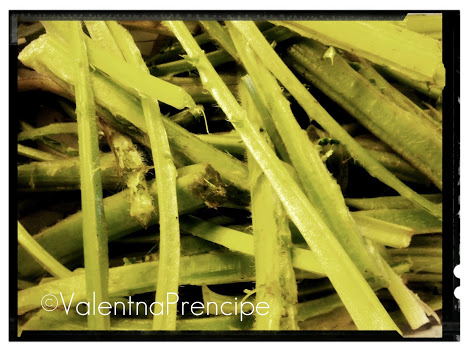
Non saprei da dove iniziare a spiegarvi come pulire i cardi mariani, ma un metodo efficace secondo me è quello di paragonare il cardo al sedano.. Pulitelo come se fosse un sedano. Un metodo ancora più efficace sarebbe quello di averli già belli e puliti (grazie Marina!).. ;-)
Comunque, i gambi puliti e qualche foglia, se la gradite, vanno lessati in acqua bollente salata fino a quando si inteneriscono. Una volta raffreddati affettateli a striscioline.
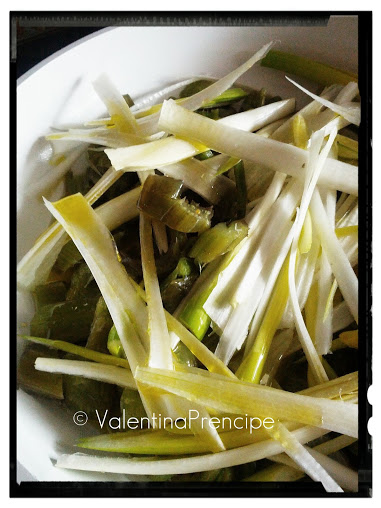
Togliete le parti verdi dagli sponsali *,e anche le parti più esterne, tagliateli a striscioline.
Nel frattempo lessate il riso integrale in abbondante acqua bollente salata.
In una padella mettere a rosolare gli sponsali con olio evo. Verso la fine, quando sono ben appassiti, aggiungete i cardi e continuate la cottura per far amalgamare i sapori.. Aggiungete il bicchiere di latte, aggiustate di sale se è necessario.
Infine versate in padella il riso dopo averlo ben scolato al dente e amalgamate per bene , sempre in padella.
Una spolverata di pepe e di pecorino (possibilmente non troppo stagionato) ed è tutto pronto!

* Gli sponsali sono delle cipolle fresche, lunghe, simili ai porri nell’aspetto, ma di sapore più dolce e delicato. Nella cucina pugliese e lucana sono molto usati per preparazioni tradizionali come ad esempio il calzone di cipolla.

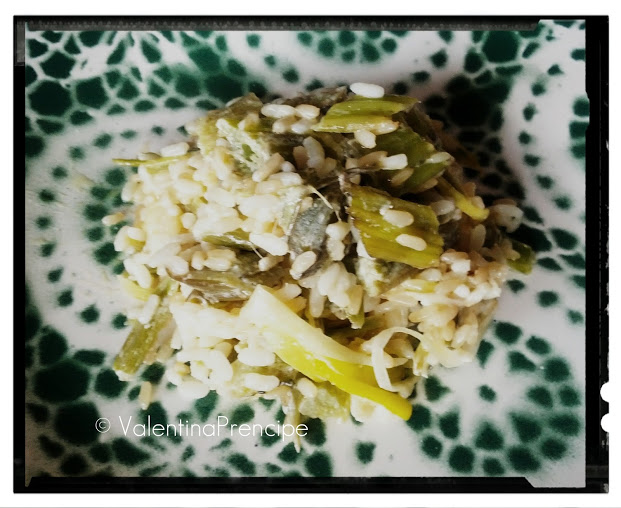
riso integrale e cardi mariani

ENGLISH

Milk thistle is known in pharmacology for its anti-inflammatory and purifying properties…BUT …
In my kitchen it is well-known for other properties! :-)
For example fried milk thistle,  milk thistle soup and so forth, but I used it in yet another way..

Brown rice with milk thistle and  leeks

Ingredients (serves 4)
Brown rice: 350 gr
Milk thistles: 500 grams more or less (weight them already clean..)
Sponsali* or small leeks: 3
Whole milk: 1 cup
Grated pecorino cheese
Pepper
Salt
Extra virgin olive oil

cardi

I can’t explain well how to clean  milk thistles, so try to compare them to celery  and  just clean them  as if they were celery, stripping them from the hard, thread-like  parts. Of course it would be better to get them already cleaned by someone else.. (thanks Marina!)  ;-)
However, boil  the cleaned stems and some of the leaves (if you like) in salted water until they’re tender. Leave them to cool off then slice them into thin strips.
Remove the green parts from the  leeks, then remove the outer parts, and slice the leeks into strips.
Meanwhile boil the rice in salted water.
Brown the  leeks in a frying pan  with olive oil, then  add the milk thistles and cook for 5 minutes to blend the flavours . Add a glass of milk and mix. Add salt at the end.
Finally pour the well drained rice in the pan and mix.
A dusting of pepper and pecorino cheese , and .. it’s ready to go!

* For this recipe I used a particular kind of onion, called “sponsale”. It looks like leek, but it’s sweeter, and it grows here in Apulia and in Basilicata too. We use it for traditional dishes such as “calzone di cipolla” (pizza filled with onions)… Don’t worry:  leeks will do! :-)

13 - 1Sponsali

Venerdì, pesce: salmone con miele, senape ed erbe/Friday fish day: salmon with mustard, honey and herbs

Standard

IMG_2904 - kopie

SCROLL DOWN FOR ENGLISH TEXT

Questa è una ricetta molto semplice che ho fatto con il mio partner di esperimenti in cucina Claudio Varone – un caro amico designer d’interni, meraviglioso artista e grande cuoco – mentre passavamo un fine settimana insieme ad alcuni amici in una bella casa nella campagna olandese.
Le mani che vedete nella foto sono le sue – io non sono così pelosa ;) – e lui ha preparato questo piatto in pochissimo tempo quindi questa è la ricetta perfetta per un piatto di grande effetto nonché semplice e rapido allo stesso tempo.

Ho intenzione di prepararlo questo venerdì perché passerò un weekend festivo del tutto senza carne. Da un po’ di tempo la sto mangiando molto meno in generale e, quando lo faccio, cerco di comprare solo quella biologica. Inoltre mi prende spesso la voglia di mangiare pesce e un bel trancio di salmone è davvero perfetto per soddisfarla.

Avrete solo bisogno di un grosso pezzo di salmone BUONO (noi abbiamo scelto quello selvaggio dell’Alaska) e pochi ingredienti in più fra cui alcune erbe fresche a scelta.
Noi abbiamo usato erba cipollina e origano fresco e dato che quest’ultimo stava fiorendo abbiamo aggiunto al piatto anche alcuni dei suoi fiori, sia per il gusto che per la loro bellezza.

Potete servire questo salmone meravigliosamente aromatico come abbiamo fatto noi, con patate biologiche bollite semplicemente condite con un filo d’olio extra vergine di oliva e sale, nonché con una bella insalata mista.
Anche le patate al forno con rosmarino e aglio sono perfette come contorno.

IMG_2900 - kopie


Salmone al forno con miele e senape

Dosi per 4 persone

500 gr. salmone fresco in un unico grande pezzo o 4 pezzi da circa 125 gr ciascuno
succo di 1 limone grande
3 cucchiai di senape
3 cucchiai di miele
una manciata di erbe miste fresche, tritate grossolanamente (erba cipollina e origano)
sale e pepe nero
olio extravergine di oliva

Preriscaldate il forno a 180°C.

Mescolate il succo di limone, la senape, il miele, un pizzico di sale e pepe e tre cucchiai di olio d’oliva sino ad ottenere una bella emulsione omogenea.

Disponete il salmone su un foglio di carta da forno abbastanza grande da avvolgerlo facilmente tutto e “massaggiatelo” con l’emulsione.
Distribuite le erbe sulla parte superiore del salmone e avvolgetelo bene nella carta da forno.

Cuocetelo in forno per circa 20-25 minuti e servite subito.

ENGLISH

This is a very simple recipe I made with my experiments-in-the-kitchen partner Claudio Varone, a dear friend, a wonderful interior designer and artist plus a great cook, when we were spending a weekend together with some friends in a lovely house on the Dutch countryside.
It’s his hands you see in the picture – I’m not THAT hairy ;) – and he prepared this dish in no time. It’s beautiful, elegant, tasty and very, very easy and fast to make.

I’m going to make this on Easter Friday because I’ve decided to have a totally meat-free Easter holiday. I’m eating a lot less meat in general since quite some time, and I try and buy only organic when I do. I also have regular fish cravings and a nice piece of wild salmon is really perfect to satisfy them.

You’ll only need a big piece of GOOD salmon (we chose the wild Alaska one) and a few more ingredients among which some fresh herbs of your choice.
We used chives and oregano and since the oregano was flowering we added some of the flowers too for extra taste and texture (and beauty!).

You can serve this wonderfully aromatic salmon like we did, with boiled organic potatoes simply dressed with extra virgin olive oil and salt, and a colourful mixed salad.
Roasted potatoes with rosemary and garlic will be perfect too.

Salmon with mustard, honey and herbs

Serves 4

500 gr. fresh salmon in one big piece, or 4 chunks of about 125 gr each
juice of 1 big lemon
3 tablespoons of mustard
3 tablespoons of honey
a handful of mixed fresh herbs, coarsely chopped (chives and oregano)
salt and black pepper
extra virgin olive oil

Preheat the oven at 180°C.

Mix lemon juice, mustard, honey, a bit of salt and pepper and three tablespoons of olive oil together making a nice, smooth emulsion.

Lay the salmon on a sheet of baking parchment big enough to easily wrap it all and “massage” it with the emulsion.
Spread the herbs on top of the salmon and wrap it well in the parchment.

Bake in the oven for about 20-25 minutes and serve immediately.

IMG_2901 - kopie

IMG_2902 - kopie

IMG_2903 - kopie

Pizza ripiena con erbette selvatiche/ Pizza filled with wild edible herbs

Standard

13 - 1 (1)

SCROLL DOWN FOR ENGLISH TEXT

Non c’è nulla che non sia assolutamente pugliese in questa ricetta.
Le erbette selvatiche fanno parte della nostra tradizione gastronomica che è assolutamente di cucina povera e contadina  e i nostri contadini erano così poveri che mangiavano erbe, al pari dei loro pochi animali in stalla..  :-)
In primavera la campagna pugliese non è bella, è meravigliosa, è spettacolare, è  indimenticabile…
Il  risveglio dei campi porta incredibili sorprese a chi conosce le erbe selvatiche.
Cicoriella di campo, ortica, borragine, malva, rucola.. Ne cito solo alcune che magari riesco un po’ a riconoscere, ma di erbe edibili selvatiche ce ne sono tantissime..  E sarebbe anche opportuno conoscerne di più, per vari “approvvigionamenti” e apprezzamenti.  Per fortuna c’è Marina che riesce a riconoscerne e a raccoglierne a “zaffuni”!  Da una raccolta di Marina provengono le erbette che hanno fatto da ripieno a questa pizza. Ed è sempre lei che mi ha suggerito la ricetta per l’impasto senza acqua.. Croccante come piace a me!

13 - 1 (4)

Ingredienti per una pizza da 6 porzioni:
Erbette selvatiche (un quantitativo decisamente “ad occhio”, direi all’incirca ½ kg, ma comunque ben lavate, bollite in acqua, salata e strizzate)
Farina tipo 0: 300 gr
Vino bianco: 100 gr
Olio evo 70 gr
Caciocavallo podolico a dadini: quanto ne gradite
Fette di capocollo di Martina Franca quanto ne gradite
Peperoncino piccante quanto ne gradite
1 uovo
sale q.b.

Procedimento:
Scaldate il vino, toglietelo dal fuoco e aggiungete l’olio, mescolate.
In una terrina mettere la farina e il sale (3 cucchiaini colmi), mescolateli .
aggiungete vino e olio un po’ alla volta, e iniziate a impastare. Una volta compattato l’impasto, copritelo e lasciatelo 30 min a riposo.
Nel frattempo amalgamate insieme  gli altri ingredienti
Dividete in 2 l’impasto, stendete un pezzo  per la base, mettetelo in una teglia unta con un filo d’olio d’oliva. Aggiungete il ripieno, e coprite con l’altra parte dell’impasto.
Cuocete in forno preriscaldato a 200° per circa 40 minuti.

pizza ripiena

13 - 1 (3)

The Apulian cuisine is rich of recipes with wild edible herbs that come from our rich country tradition.
During springtime the countryside is not just beautiful: it’s wonderful, spectacular, unforgettable …
The awakening  of nature brings incredible surprises for those who know  how to recognize and pluck wild edible herbs.

Chicory, nettle, borage, mallow, rocket... Just to mention a few that I can recognize.
I would like to know more of them. Thank goodness I have Marina who helps me with the  “supplies” :-) and even told me how to make the wonderful, crunchy waterless dough I love so much!
All the ingredients for this pizza are Apulian, but if you can’t find caciocavallo cheese or capocollo (It’s a typical salami), then use your inspiration and you will find something that fits!

Ingredients (serves 6):

Wild herbs: more or less 500 gr
Flour type 0: 300 gr
White wine: 100 gr
Extra virgin olive oil: 70 gr
Caciocavallo cheese in small cubes: as much as you like!
Slices of capocollo from Martina Franca: as much as you like!
Hot chili pepper as much as you like
1 egg
salt

Clean the wild herbs removing the hard parts and the bigger leaves, then wash them well and boil them in salted water for 15 minutes. Leave them to cool off a bit and then squeeze them well to remove the excess water.
Heat the wine (not so much) in a little pan, remove from the flame and add the oil. Mix well.
Sieve the flour in a bowl and add the salt (3 teaspoons). Mix well.
Add the wine and oil mixture little by little and begin to knead. When the dough is compact, wrap it in cling film and leave it to rest for 30 minutes.
Now mix together the ingredients for the filling.
Divide the dough in two pieces and flatten them with the rolling pin. One of them will be the base of this “pizza”.
Place the base in a oven dish greased with a drizzle of olive oil. Add the filling and cover with the other part of the flattened dough.
Bake in the preheated oven at 200° C for about 40 minutes.

13 - 1

#MeatFreeMonday: riso e lenticchie/rice with lentils

Standard

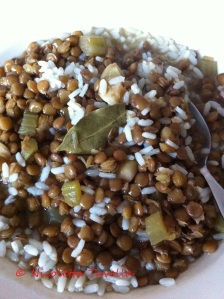
IMG_1995 copySCROLL DOWN FOR ENGLISH TEXT

Questo è un piatto umile che adoro. Semplicità allo stato pure, giusto qualche ingrediente e massima resa in quanto a profumi e sapori.

La cucina povera è uno dei punti di forza della nostra cultura alimentare: piatti a dir poco commoventi, che saziano costando poco e con la minima fatica, oltretutto con ingredienti facili da reperire.
Questo riso e lenticchie ne è un esempio. Un piatto semplice e, nonostante ciò, del vero e proprio comfort food. Inoltre è perfetto per le giornate fredde che ancora ci stanno tartassando (almeno qui ad Amsterdam dove siamo ancora sotto zero!).

Le lenticchie verdi e marroni di solito possono essere utilizzate senza lasciarle in acqua come gli altri legumi, infatti ho scoperto che lasciandole prima in ammollo si spezzano molto più facilmente, diventando una poltiglia.
Compro sempre lenticchie biologiche e le metto direttamente in pentola dopo averle semplicemente sciacquate. Hanno bisogno di circa 30-40 minuti per cuocersi bene. Aggiungo il sale solo pochi minuti prima che siano pronte perché anche questo promuove lo spappolamento delle lenticchie, proprio come la cottura a fuoco troppo alto (lasciatele borbottare tranquillamente su una fiamma medio-bassa e vedrete che buone!).

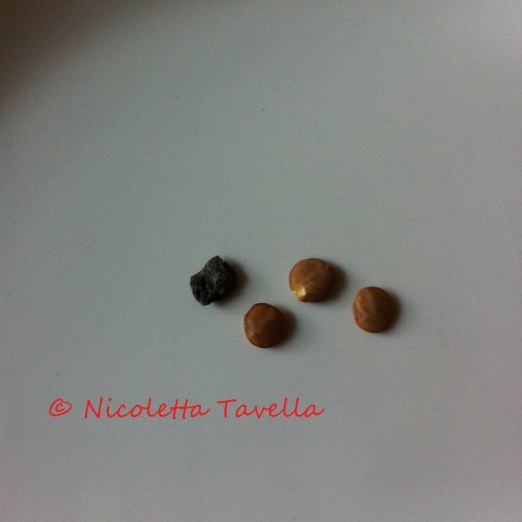
E’ importante verificare che non vi siano pietroline tra le lenticchie – io le trovo regolarmente. A tale scopo, lasciate cadere  piccole quantità di lenticchie secche dal pacchetto in un piattino bianco: in questo modo potrete vedere immediatamente  eventuali “intrusi” ed eliminarli.

Scegliete un buon riso Arborio, molto adatto per questa preparazione, e fatelo cuocere in abbondante acqua salata, scolandolo poi per bene.

Riso e lenticchie

Preparazione: 1 ora

Per 4 persone

300 g di lenticchie marroni o verdi secche
4 cucchiai di olio extravergine di oliva
3 spicchi d’aglio, pelati
1 gambo di sedano, senza fili e a pezzettini
4 foglie di alloro
1 piccola cipolla, sbucciata e intera
eventualmente anche un paio di pomodori pelati a pezzetti, per il colore
sale
300 g di riso Arborio

Scaldate l’olio in una casseruola pesante e aggiungete gli spicchi d’aglio schiacciati, il sedano e le foglie di alloro.
Lasciate che l’aglio si dori lentamente e aggiungete le lenticchie e la cipolla.
Aggiungete acqua fredda a sufficienza, ovvero in modo che superi le lenticchie di circa 4 cm (ed eventualmente aggiungete i pomodori pelati).
Lasciate cuocere le lenticchie a fuoco basso per 30-40 minuti. Mescolate di tanto in tanto e controllate regolarmente che siano ancora abbastanza umide e non si attacchino. Se necessario, aggiungete un po’ d’acqua calda.
Aggiustate di sale a cottura quasi ultimata. Devono risultare ben cotte e ancora intere e avere abbastanza liquido di cottura.

Cuocete il riso al dente in abbondante acqua salata e scolate.

Servite metà riso e metà lenticchie con un po ‘d’acqua di cottura e un cucchiaio d’olio extra vergine di oliva in ogni piatto.

IMG_1998 - kopie

Attenzione, intrusi! / Intruders alert!

ENGLISH

This is a humble dish that I love. Simplicity at its best, just a few ingredients and maximum efficiency in terms of flavours.

The cucina povera (poor man’s cuisine) is one of the strengths of the Italian culture: food that is often moving for its purity and taste, which satiates, costs just a little and requires only a minimum effort, plus with ingredients that are very easy to find.
Rice with lentils is one example of this type of cooking. Simple and yet a real comfort food. Moreover, it’s perfect for cold days like the ones we’re still having here in Amsterdam!.

Green and brown lentils can usually be cooked without soaking them in water first like other bean types, in fact I discovered that if you soak them they break down a lot more easily and get all mushy.
I always buy organic lentils and put them directly in the pot after simply rinsing them. They need about 30-40 minutes to get cooked properly. Add salt only a few minutes before they’re ready because this promotes breaking down during cooking, like boiling them on too high a flame (let them simmer quietly on a medium-low flame and you’ll see how nice they get!).

It’s important to check that there are no little stones between the dry lentils – I find them regularly. To do this, drop small amounts of dried lentils from the package on a white saucer: this way you’ll be able to immediately see any “intruders” and remove them.

Choose a good Arborio rice, very suitable for this preparation, and cook in abundant salted water, draining it well well once ready.

Rice with lentils

Preparation: 1 hour

Serves 4

300 g of dried green or brown lentils
4 tablespoons extra virgin olive oil
3 cloves of garlic, peeled
1 stalk celery, cut into small pieces, thread removed
4 bay leaves
1 small whole onion, peeled
if you like, a couple of peeled tomatoes into small pieces, for the extra colour
salt
300 g Arborio rice

Heat the oil in a heavy saucepan and add the crushed garlic cloves, celery and bay leaves.
Let the garlic slowly become golden brown and add the lentils and onion.
Add enough cold water, enough to cover the lentils by about 4 cm,  and the peeled tomatoes if you’re using them.
Cook the lentils over a low heat for 30-40 minutes. Stir occasionally and check regularly to make sure they’re still quite soupy and don’t stick to the bottom of the pan. If necessary, add a little hot water from time to time.
Season with salt when almost ready. They have to be thoroughly cooked and still be “swimming” in enough cooking liquid.

Cook the rice in salted boiling water and drain.

Serve half rice and half lentils with a little cooking water and a tablespoon of extra virgin olive oil on each plate.

Scarcelle pasquali / Easter cookies from Puglia

Standard


Gevlochten brood nicoletta tavella maandag 4559 - kopieSCROLL DOWN FOR ENGLISH TEXT

Le scarcelle sono teneri e bellissimi dolci pasquali pugliesi che vengono sagomati in forme molto diverse – cestini, pulcini, ghirlande, campane di Pasqua, agnellini, uova – spesso come semplici biscotti e a volte ripieni di marmellata e pasta di mandorle, e in quest’ultima versione sono davvero irresistibili.

Essendo cresciuta in Puglia da piccola le mangiavo quando amici dei miei ce le portavano in regalo dal Salento e, come tutti i bambini,  le adoravo per le forme carine e anche per le decorazioni, fatte con glassa bianca e “perline” di zucchero croccante argentate o coloratissime.
L’anno scorso le ho fatte per la prima volta perché ho deciso di inserirle nel mio libro “Cucina di casa mia” – questa è la ricetta che compare nel libro – e mi sono di nuovo piaciute davvero tanto.
In questa versione  non sono stucchevoli – io le faccio senza glassa – e hanno quel buon saporino dato dalla buccia di limone e d’arancia grattugiata che le rende ancora più appetitose. E poi fanno tantissima allegria!
Fatene un bel po’ e regalatele ad amici e parenti com’è tradizione in Puglia nel periodo della settimana santa.

IMG_2401 - kopie

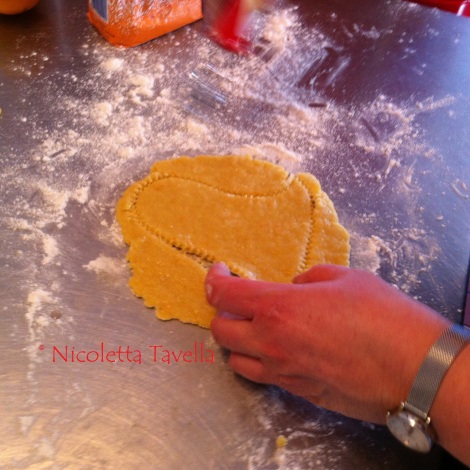
Consiglio: per ottenere delle belle forme potete usare dei tagliabiscotti piuttosto grandi oppure disegnare le figure desiderate su cartoncino, ritagliarle e poi poggiare le sagome sulla pasta per tagliare quest’ultima in modo più preciso. Io ho usato semplicemente una rotella tagliapasta. Quelle che vedete fotografate dal food photographer olandese Jan Bartelsman per il mio libro sono state tagliate con  precisione architetturale del solito, mitico amico Claudio Varone che mi ha aiutato nella preparazione di alcuni dolci da fotografare quando cucinavo per il libro. :)

Scarcelle pasquali

Preparazione: 20 minuti
Tempo di riposo: 40 minuti
Forno: 20-25 minuti

Per 5-6 scarcelle

500 g di farina tipo ’00 ‘+ un po’ di farina extra
7 g di lievito in polvere istantaneo
200 g di zucchero
1 dl di olio extravergine d’oliva
2 + 1 uovo
5 cucchiai di latte
scorza grattugiata di 1 limone
scorza grattugiata di 1/2 arancia
1 pizzico di sale
5-6 uova sode
palline di zucchero colorate o perline di zucchero argentate

Preriscaldate il forno a 180 ° C.
Mescolate bene farina e lievito poi aggiungete lo zucchero, l’olio d’oliva, 2 uova, il latte, la scorza di limone e d’arancia e un pizzico di sale.
Impastate tutti gli ingredienti insieme, possibilmente nel mixer con lo speciale gancio per la pasta. Se l’impasto è troppo duro, aggiungete qualche cucchiaio di latte e impastate ulteriormente. Se invece l’impasto risulta appiccicoso aggiungete un po ‘di farina.
Lasciate riposare per 40 minuti nella ciotola coperta con pellicola trasparente e tenuta al caldo. Nel frattempo, rassodate 5-6 uova e lasciatele raffreddare.
Spolverate il piano di lavoro con della farina e stendete la pasta con il mattarello a circa 8 mm – 1 cm di spessore. Tagliate le forme desiderate (ca. 15 x 13 cm) e posizionate le scarcelle su una teglia ricoperta di carta forno.
Preparate delle strisce o delle piccole trecce con i ritagli di pasta facendo in modo che siano abbastanza lunghe da permettervi di fissare le uova sode alle scarcelle.
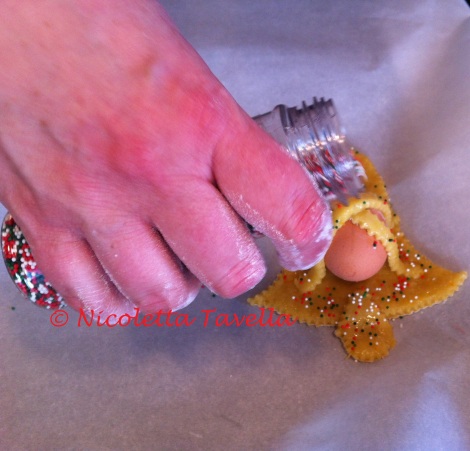
Mettete un uovo sodo su ogni scarcella e fissatelo con due strisce o treccioline applicate in modo da incrociarsi (vedere le foto). Premete bene le estremità in modo da far aderire le striscioline alle scarcelle.
Sbattete un uovo e spennellatevi le scarcelle utilizzando un pennello da cucina. Guarnite con le perle di zucchero colorate o argentate che aderiranno all’uovo.
Infornate le scarcelle per 20 minuti o fino a quando risulteranno ben dorate.

IMG_2410 - kopie

ENGLISH

Scarcelle are lovely Apulian Easter cookies with different shapes – baskets, chicks, garlands, Easter bells, little lambs, eggs – often prepared as plain biscuits and sometimes filled with jam and almond paste. In this version I find them truly irresistible.

Growing up in Puglia I used to eat them when I was a child and some friends of my parents’ brought them as a gift from the Salento area. Like all kids, I loved them for their pretty shapes as well as for the decorations, made with white sugar frosting and little crunchy silver or multicoloured sugar “beads”. Nowadays I love them because they taste great and because they remind me of my childhood.
Last year I made them for the first time when I decided to feature them in my cookbook “Cucina di casa mia” – the recipe you find here is the one from the book – and once again I enjoyed them very much.
In this version they are not super sweet – I don’t use the white, sugary icing – and have that lovely taste given by the grated lemon and orange peel which makes them even more appetizing. And they’re so colourful and happy-making!
Prepare lots of them and give them to friends and family as it’s traditionally done in Puglia during Holy Week.

IMG_2397 kopie

Tip: to make beautiful, regular shapes you can use large cookie cutters or you can draw the desired silhouettes on thin cardboard, cut them and then place them on the dough to cut it more neatly. I simply used a pasta wheel cutter. The scarcelle you see photographed by Dutch food photographer Jan Bartelsman for my book have been cut with architectorial precision by Claudio Varone, my friend and mythical companion of culinary experimentations who helped me to prepare some of the sweets when cooking for my cookbook. :)

Scarcelle (Apulian Easter cookies)

Preparation: 20 minutes
Resting time: 40 minutes
Oven: 20-25 minutes

For 5-6 scarcelle

500 g plain flour  + a little extra
7 g instant baking powder
200 g of sugar
1 dl of extra virgin olive oil
2 + 1 eggs
5 tablespoons milk
grated zest of 1 lemon
grated zest of 1/2 orange
1 pinch of salt
5-6 hard-boiled eggs
coloured sugar beads

Preheat the oven to 180 ° C.
Mix flour and baking powder, then add the sugar, the olive oil, 2 eggs, milk, lemon and orange zest and a pinch of salt.
Mix all ingredients together, preferably in a blender with a special dough hook. If the dough is too stiff, add a few tablespoons of milk and mix further. If it’s too sticky, add a little extra flour.
Live to rest for 40 minutes inside the bowl covered with cling film and keep warm. Meanwhile, boil 5-6 eggs and let them cool.
Dust the working surface with flour and roll out the dough with a rolling pin to a thickness of about 8 mm – 1 cm. Cut the desired shapes (approx. 15 x 13 cm) and place your scarcelle on a baking sheet covered with baking parchment.
Prepare enough strips or small braids with the scraps of dough and make sure they are long enough to allow you to secure the hard-boiled eggs to the scarcelle.
Place one egg on each scarcella and secure it with two strips or braids of dough crossing each other (see photos). Press the ends well so that they adhere to the scarcelle.
Beat an egg and brush the scarcelle with it using a pastry brush. Decorate with coloured or silver sugar beads that will stick to the beaten egg.
Bake the scarcelle for about 20 minutes or until they are golden brown.